


Registrazione e Trascrizione delle Riunioni
8 min di lettura
Updated on:
Feb 3, 2025
Come accedere alle registrazioni di Zoom? Una guida passo dopo passo
Vuoi sapere dove finiscono le tue registrazioni Zoom? Ecco dove dovresti guardare.
Registrare le tue riunioni Zoom ti aiuta a conservare discussioni importanti e a condividere informazioni con i membri del team assenti.
Tuttavia, tutti questi vantaggi svaniscono se fai fatica a trovare le sessioni registrate!
In questo articolo, vedremo come individuare e accedere alle registrazioni di Zoom.
Dove finiscono le registrazioni di Zoom?
Le registrazioni di Zoom possono essere archiviate in due posizioni: localmente sul tuo computer o sul Cloud di Zoom. L'opzione di archiviazione a tua disposizione dipende dal tipo di account Zoom che possiedi. Se utilizzi un account gratuito, le tue registrazioni Zoom vengono salvate localmente sul tuo dispositivo.
Ciò significa che avrai bisogno di spazio di archiviazione sufficiente per conservarle. Tuttavia, come utente con un account a pagamento, godi di maggiore flessibilità. Puoi scegliere di salvare le tue registrazioni localmente o sul Cloud. L'archiviazione su Cloud ti consente di accedere alle tue registrazioni da qualsiasi luogo e di risparmiare spazio.
Come accedere alle registrazioni sul Cloud di Zoom?
Per accedere alle registrazioni sul Cloud di Zoom, segui i passaggi indicati di seguito:
- Accedi a Zoom: Vai al portale web di Zoom ed effettua l'accesso con le tue credenziali.
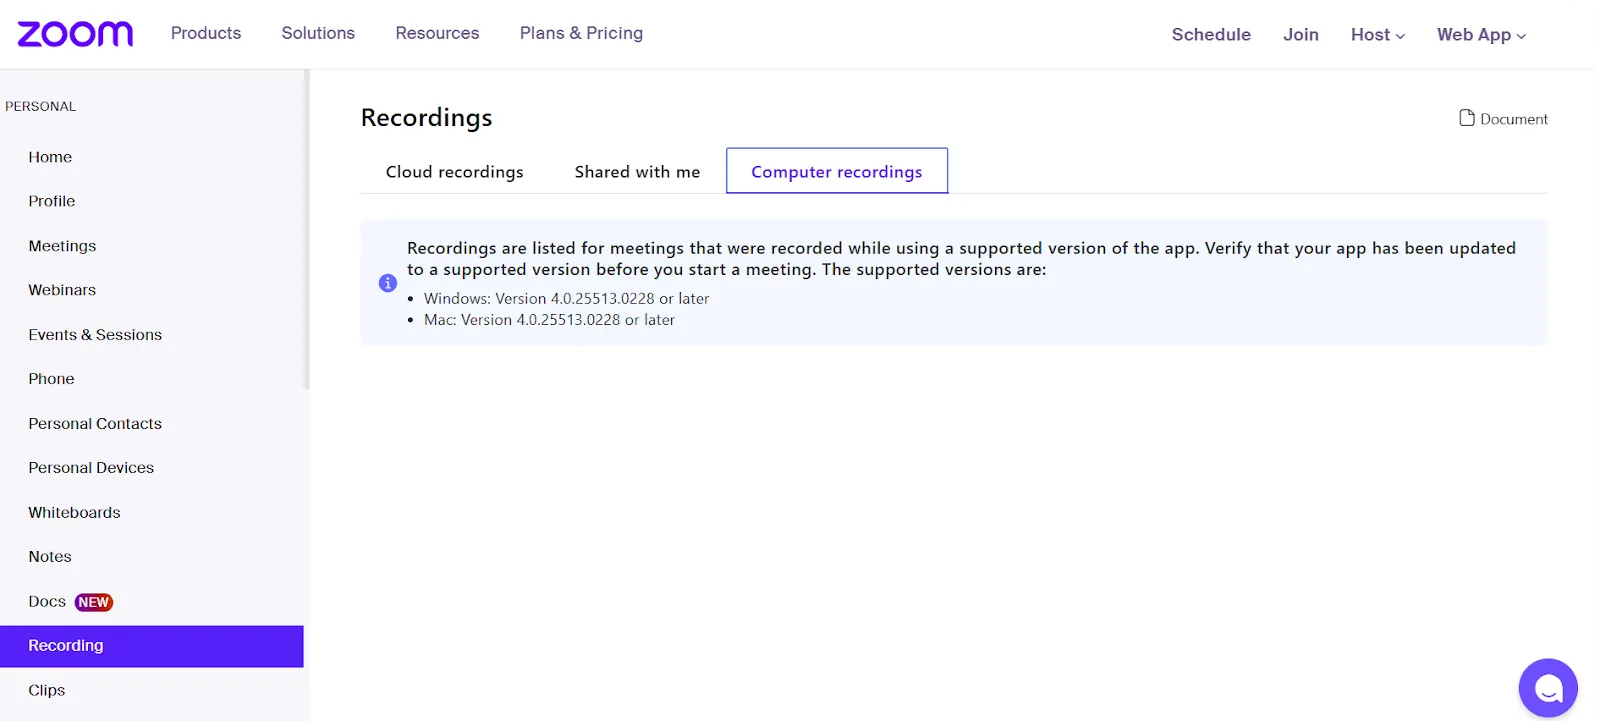
- Vai su Registrazioni: Nel menu a sinistra, clicca su "Registrazioni."
- Seleziona Registrazioni su cloud: Clicca sulla scheda "Registrazioni su cloud" per visualizzare le tue riunioni registrate.
- Trova la tua registrazione: Scorri l'elenco o usa la barra di ricerca per individuare una registrazione specifica tramite ID riunione, argomento o parole chiave.
- Accedi alla registrazione: Clicca sull'argomento della riunione per aprire i dettagli della registrazione. Qui potrai visualizzare la registrazione.

Come accedere alle registrazioni locali di Zoom?
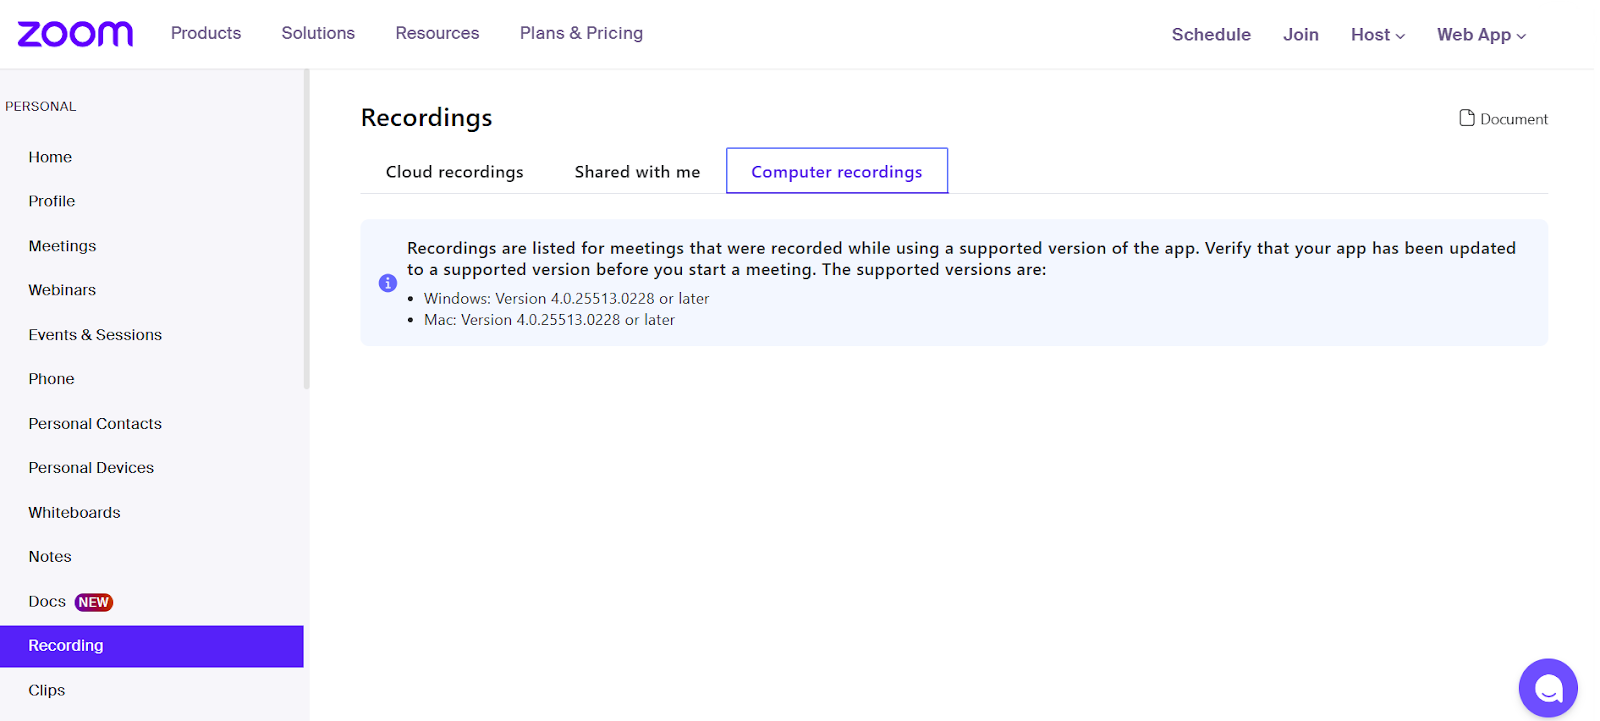
Trovare le registrazioni locali è semplice e può essere fatto in diversi modi. Ecco come accedervi:Tramite il portale web di Zoom
- Accedi al tuo account Zoom su zoom.us.
- Clicca su "Il mio account" nell'angolo in alto a destra.
- Vai alla scheda "Registrazioni" nella barra laterale sinistra.
- Sotto "Registrazioni locali," vedrai un elenco delle tue riunioni registrate.
- Fai clic sul titolo della riunione per visualizzare o scaricare la registrazione.
Tramite l'app desktop Zoom
- Apri l'applicazione desktop Zoom.
- Fai clic sulla scheda "Riunioni" in alto.
- Seleziona la scheda "Registrate" sulla sinistra.
- Scegli la riunione a cui desideri accedere.
- Tocca "Apri" per visualizzare la cartella della registrazione.
Tramite la cartella Documenti
Per Windows:
- Fai clic sull' Esplora file icona nella barra delle applicazioni.
- Vai su Disco locale (C:) > Utenti
- Individua e fai clic sulla cartella associata al tuo nome utente.
- Fai clic su "Documenti."
- Apri la cartella "Zoom" per trovare le tue registrazioni.

Per Mac:
- Apri l' icona del Finder , che si trova nel Dock del tuo Mac.
- Fai clic su "Documenti."
- Apri la cartella "Zoom" per accedere alle tue registrazioni.
Per Linux:
- Apri il tuo file manager.
- Vai alla tua directory home.
- Apri la cartella "Documenti" .
- Individua e apri la cartella "Zoom" per trovare le tue registrazioni.
Guida passo dopo passo per trovare le registrazioni Zoom su dispositivi mobili
I dispositivi mobili sono un ottimo modo per accedere alle registrazioni Zoom quando sei in movimento. La procedura è piuttosto semplice, sia su Android che su iPhone. Ecco come trovare le registrazioni Zoom da mobile:
Per le registrazioni nel cloud:
- Apri l'app Zoom: Avvia l'app Zoom sul tuo dispositivo mobile.
- Vai alle Impostazioni: Tocca "Altro" (tre puntini) nell'angolo in basso a destra, quindi seleziona "Impostazioni."
- Accedi alle registrazioni: Nel menu delle impostazioni, tocca "Registrazioni" per visualizzare le tue registrazioni nel cloud.
Per le registrazioni locali:
Attualmente, Zoom non supporta le registrazioni locali su dispositivi mobili. Pertanto, tutte le registrazioni effettuate sul tuo dispositivo mobile vengono salvate nel cloud di Zoom.
Metodo alternativo tramite browser web:
- Apri il browser: Sul tuo dispositivo mobile, apri un browser web e vai al sito web di Zoom.
- Accedi: Accedi al tuo account Zoom.
- Accedi alle registrazioni: Clicca su "Registrazioni" nel menu a sinistra per visualizzare le tue registrazioni nel cloud.
Come accedere alle registrazioni Zoom condivise da altri?
Se desideri visualizzare le registrazioni Zoom condivise da altri, segui questi passaggi:
- Ricevi il link condivisibile: L'organizzatore della riunione o il partecipante che ha registrato la sessione può condividere un link con te. Questo link ti garantisce l'accesso alla registrazione.
- Apri il link: Clicca sul link condiviso. Verrai reindirizzato al portale web di Zoom, dove potrai visualizzare la registrazione.
- Inserisci il passcode (se richiesto): Alcune registrazioni potrebbero richiedere un passcode. Se richiesto, inserisci il codice fornito dall'organizzatore o dal partecipante.
Nota: L'accesso alle registrazioni Zoom dipende dalle autorizzazioni impostate dall'organizzatore della riunione o dalla persona che ha avviato la registrazione. In caso di problemi nell'accesso alla registrazione, contatta l'organizzatore o il partecipante per ricevere assistenza.
Modifica della posizione di salvataggio predefinita per le registrazioni locali
Per impostazione predefinita, Zoom salva le registrazioni locali nella cartella "Documenti" del tuo computer. Tuttavia, puoi modificare questa posizione per organizzare meglio i tuoi file o salvarli su un'unità diversa. Ecco come cambiare la posizione di salvataggio per le registrazioni locali:
- Apri il client desktop di Zoom e clicca sulla tua immagine del profilo nell'angolo in alto a destra.
- Seleziona “Impostazioni” dal menu a tendina.
- Nella finestra Impostazioni, clicca sulla scheda “Registrazione”.
- Sotto la sezione “Registrazione locale”, clicca su “Cambia” accanto all'opzione "Salva le mie registrazioni in".
- Scegli una nuova cartella sul tuo computer e clicca su “Seleziona cartella” per confermare.
Condividere le registrazioni delle tue riunioni Zoom
Ora che hai accesso alle tue registrazioni Zoom, è il momento di condividerle con il tuo team. Ecco come fare:
Per le registrazioni nel cloud
- Accedi al portale web di Zoom.
- Nel menu di navigazione, fai clic su "Registrazioni."
- Fai clic sulla scheda "Registrazioni nel cloud" e seleziona la riunione che desideri condividere.
- Fai clic sul pulsante "Condividi". Puoi copiare il link condivisibile e inviarlo tramite e-mail o chat.
Inoltre, puoi regolare le impostazioni di condivisione, ad esempio richiedendo un passcode o limitando l'accesso a utenti specifici.
Per le registrazioni locali
- Individua la registrazione che desideri condividere e copiala.
- Carica il file su un servizio di archiviazione cloud come Dropbox.
- Una volta caricato, genera un link condivisibile e invialo ai destinatari desiderati.

Download delle registrazioni nel cloud
Desideri una versione offline della tua registrazione Zoom Cloud? In tal caso, segui questi passaggi:
- Vai al portale web di Zoom e accedi con le tue credenziali.
- Nel menu a sinistra, clicca su “Registrazioni”. Successivamente, seleziona la scheda “Registrazioni cloud” per visualizzare le tue riunioni registrate.
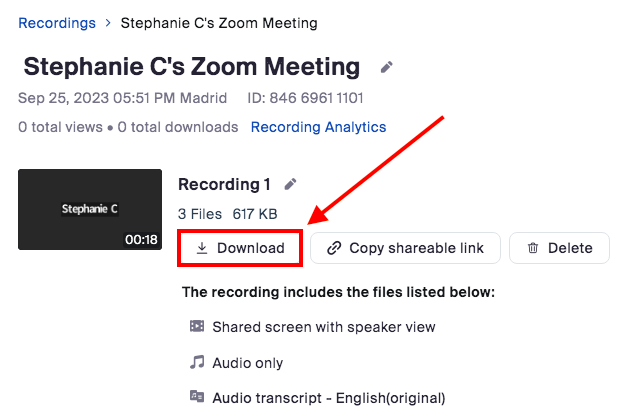
- Scorri l'elenco delle registrazioni e clicca sulla riunione che desideri scaricare.
- Nella pagina della registrazione, premi il pulsante “Scarica” accanto al file video che vuoi salvare. Apparirà una richiesta di conferma; clicca su “Scarica” per confermare.
Documentazione Seamless Meeting Zoom: Noota
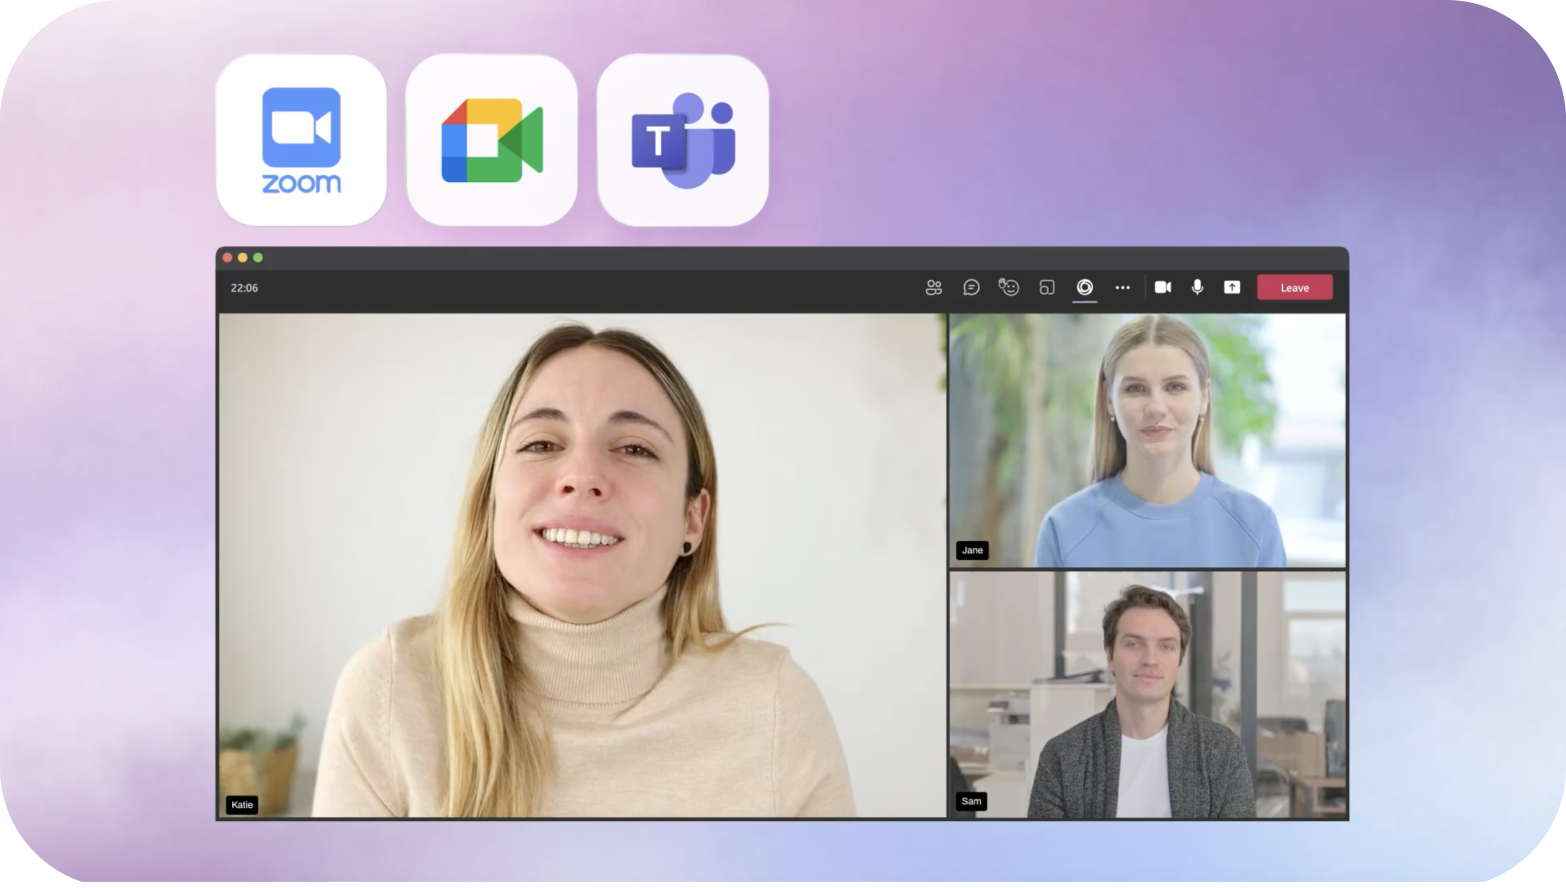
Ora che hai le tue registrazioni Zoom, usa Noota per trasformarle in qualcosa di più di una semplice riproduzione. Questo strumento basato sull'intelligenza artificiale converte le tue riunioni in trascrizioni dettagliate, riassunti concisi e approfondimenti chiave, rendendo i tuoi incontri più produttivi ed efficaci.
- Trascrizioni accurate: Noota registra le conversazioni e le trascrive automaticamente con estrema precisione, assicurando che nulla vada perso durante le riunioni. In questo modo puoi concentrarti sulla conversazione invece di preoccuparti di prendere appunti manualmente.
- Riassunti e punti chiave: Dopo la riunione, Noota genera riassunti concisi, evidenziando i concetti principali. Questo rende più semplice rivedere le riunioni senza dover ascoltare l'intera registrazione.
- Identificazione dei parlanti: Noota è in grado di distinguere i diversi interlocutori, chiarendo chi ha detto cosa durante la riunione. Questa funzione è particolarmente utile per rivedere discussioni dettagliate o attività assegnate a persone specifiche.
- Integrazione perfetta nel tuo flusso di lavoro: Noota AI si integra senza sforzo con il CRM o i sistemi di gestione delle attività che già utilizzi, garantendo un flusso di lavoro più efficiente.
Vuoi trasformare le tue sessioni Zoom in approfondimenti azionabili e ricercabili? Prova Noota gratuitamente.
(Domande frequenti)
Quanto tempo richiede l'elaborazione di una registrazione Zoom?
L'elaborazione delle registrazioni Zoom richiede solitamente da 5 minuti a un'ora, a seconda della durata e delle dimensioni del file. Riunioni più lunghe o con molti partecipanti potrebbero richiedere più tempo; riceverai un'email non appena l'elaborazione sarà completata.
È meglio registrare Zoom sul computer locale o sul cloud?
La registrazione sul cloud è comoda per un facile accesso e condivisione, oltre a essere salvata automaticamente. Tuttavia, le registrazioni locali offrono un maggiore controllo sulle dimensioni del file e sull'archiviazione. Scegli il cloud se hai bisogno di accedere da più dispositivi o se prevedi di condividere frequentemente la registrazione.
Per quanto tempo rimangono disponibili le registrazioni Zoom?
Le registrazioni nel cloud vengono conservate per 30 giorni per impostazione predefinita, dopodiché vengono eliminate a meno che non venga richiesta manualmente un'estensione. Le registrazioni locali vengono salvate sul tuo computer senza limiti di tempo, ma la gestione dello spazio di archiviazione è a tuo carico. È fondamentale eseguire il backup delle registrazioni nel cloud se prevedi di averne bisogno per più di 30 giorni.
Chi è l'autore
.webp)
FAQ
Le registrazioni Zoom si salvano in due posizioni: localmente sul tuo dispositivo o nel Cloud Zoom. Gli account gratuiti salvano solo localmente, mentre gli account a pagamento offrono entrambe le opzioni per maggiore flessibilità e accesso da qualsiasi luogo.
- Account gratuiti: salvataggio locale sul dispositivo
- Account a pagamento: scelta tra locale e Cloud
- Cloud storage: accesso da qualunque dispositivo
Puoi accedere alle registrazioni locali tramite il portale web Zoom, l'app desktop o direttamente dalla cartella Documenti. Su Windows, Mac e Linux la procedura è simile: accedi a Documenti > Zoom per trovare tutti i tuoi file registrati.
- Via portale web: Account > Registrazioni > Local Recordings
- Via app desktop: Meetings > Recorded tab
- Via file manager: Documents > Zoom folder
Mentre Zoom richiede accesso manuale alle registrazioni sparse in cloud o locali, Noota centralizza automaticamente tutte le registrazioni con trascrizioni intelligenti in 80+ lingue. Con Noota risparmi 6,4 ore settimanali di admin (-80%) e ottieni ricerca istantanea, riassunti AI e condivisione semplificata con i 5000+ team che già ci usano.
- Zoom: accesso manuale, nessuna trascrizione automatica
- Noota: centralizzazione automatica con AI e trascrizioni
- Noota: 4,9/5 su G2, risparmio tempo garantito
Noota è la soluzione ideale per team che registrano frequentemente meeting. Automatizza il salvataggio, genera trascrizioni in 80+ lingue, crea riassunti AI e permette ricerca full-text istantanea. Perfetto per ridurre l'admin del 80% e risparmiare 6,4 ore settimanali. Prova Noota gratis — nessuna carta di credito richiesta.
- Automazione completa delle registrazioni e trascrizioni
- Ricerca intelligente e riassunti AI in tempo reale
- Integrazione con Zoom e 80+ lingue supportate