Management
●
June 29, 2026
●
8 min reading
How to take Notes on Webex : a Complete Guide
It's not always clear how to take notes automatically of Webex meetings.
Some features depend on Cisco AI Assistant. Others depend on recording settings, host permissions, admin controls, or your Webex plan.
In this guide, you’ll learn how Webex default AI Note Taker works, and also other ways.
How Webex AI Note Taking Works
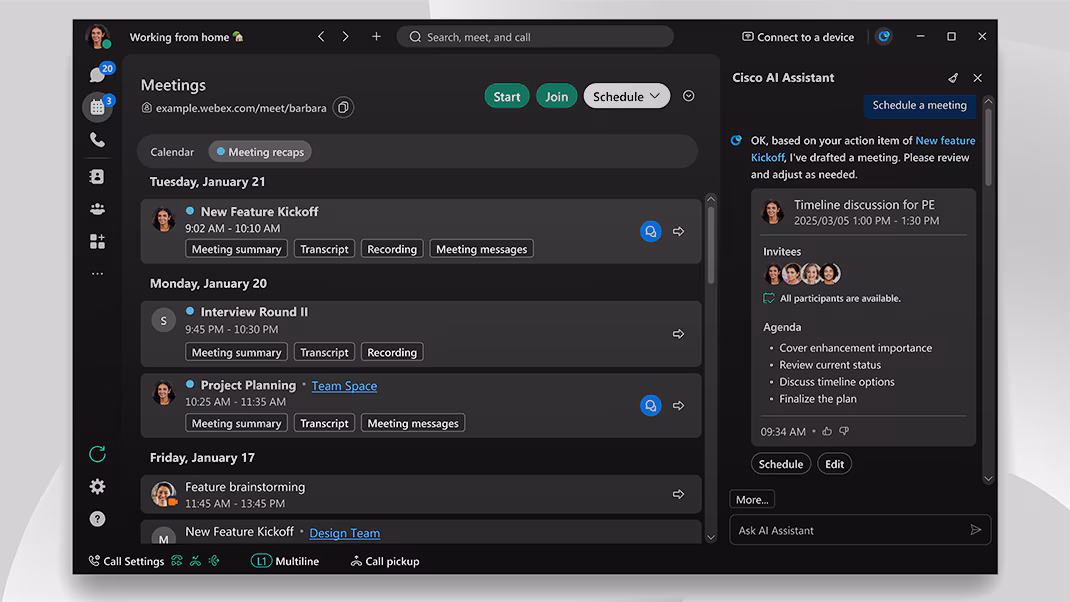
The first way to take notes on Webex is with Cisco AI Assistant in Webex meetings. It's the AI notes assistant built-in Webex that you can accesss starting with Webex Meet paid plans ($144
/user/year).
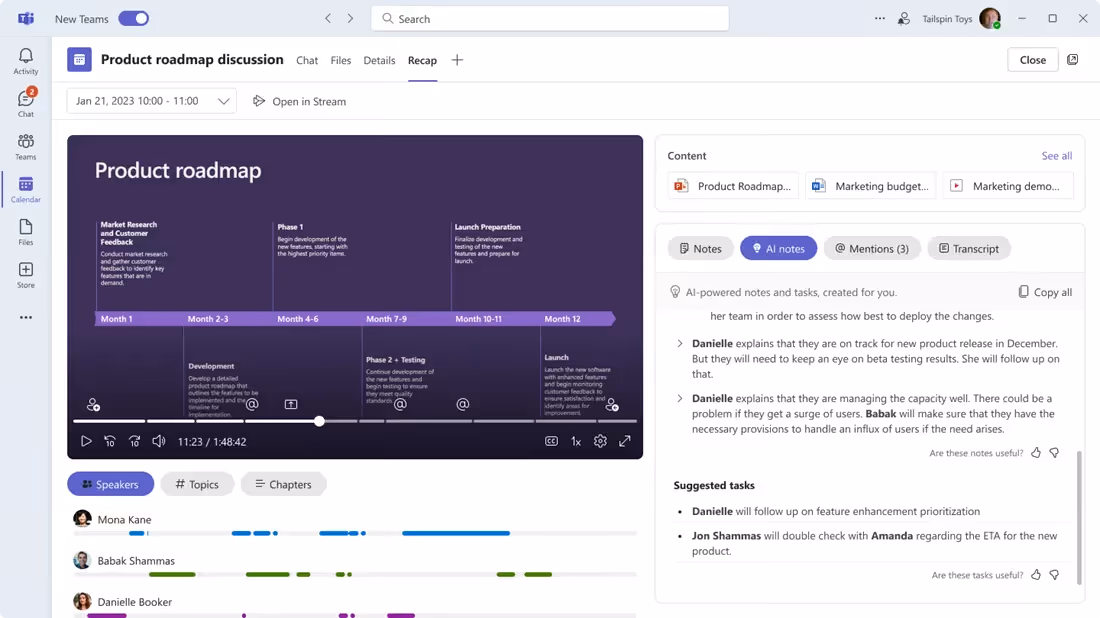
For recorded meetings, Webex AI Note taker can generate AI summaries with notes, action items, transcripts, and chapters.
Cisco first introduced its generative AI assistant for Webex in 2023. In 2024, Cisco expanded these features through Cisco AI Assistant for Webex Suite.
More recently, Webex has continued to add AI note-taking options across meetings, recordings, calling, and devices. On some Cisco Board, Desk, and Room devices, AI Notes can also transcribe conversations and send summaries and action items afterward.
If you want a free and complete Webex AI Note taker, you can also use Noota Webex integration.
How to Use Webex Note Taker
Step 1: Check if Cisco AI Assistant is enabled
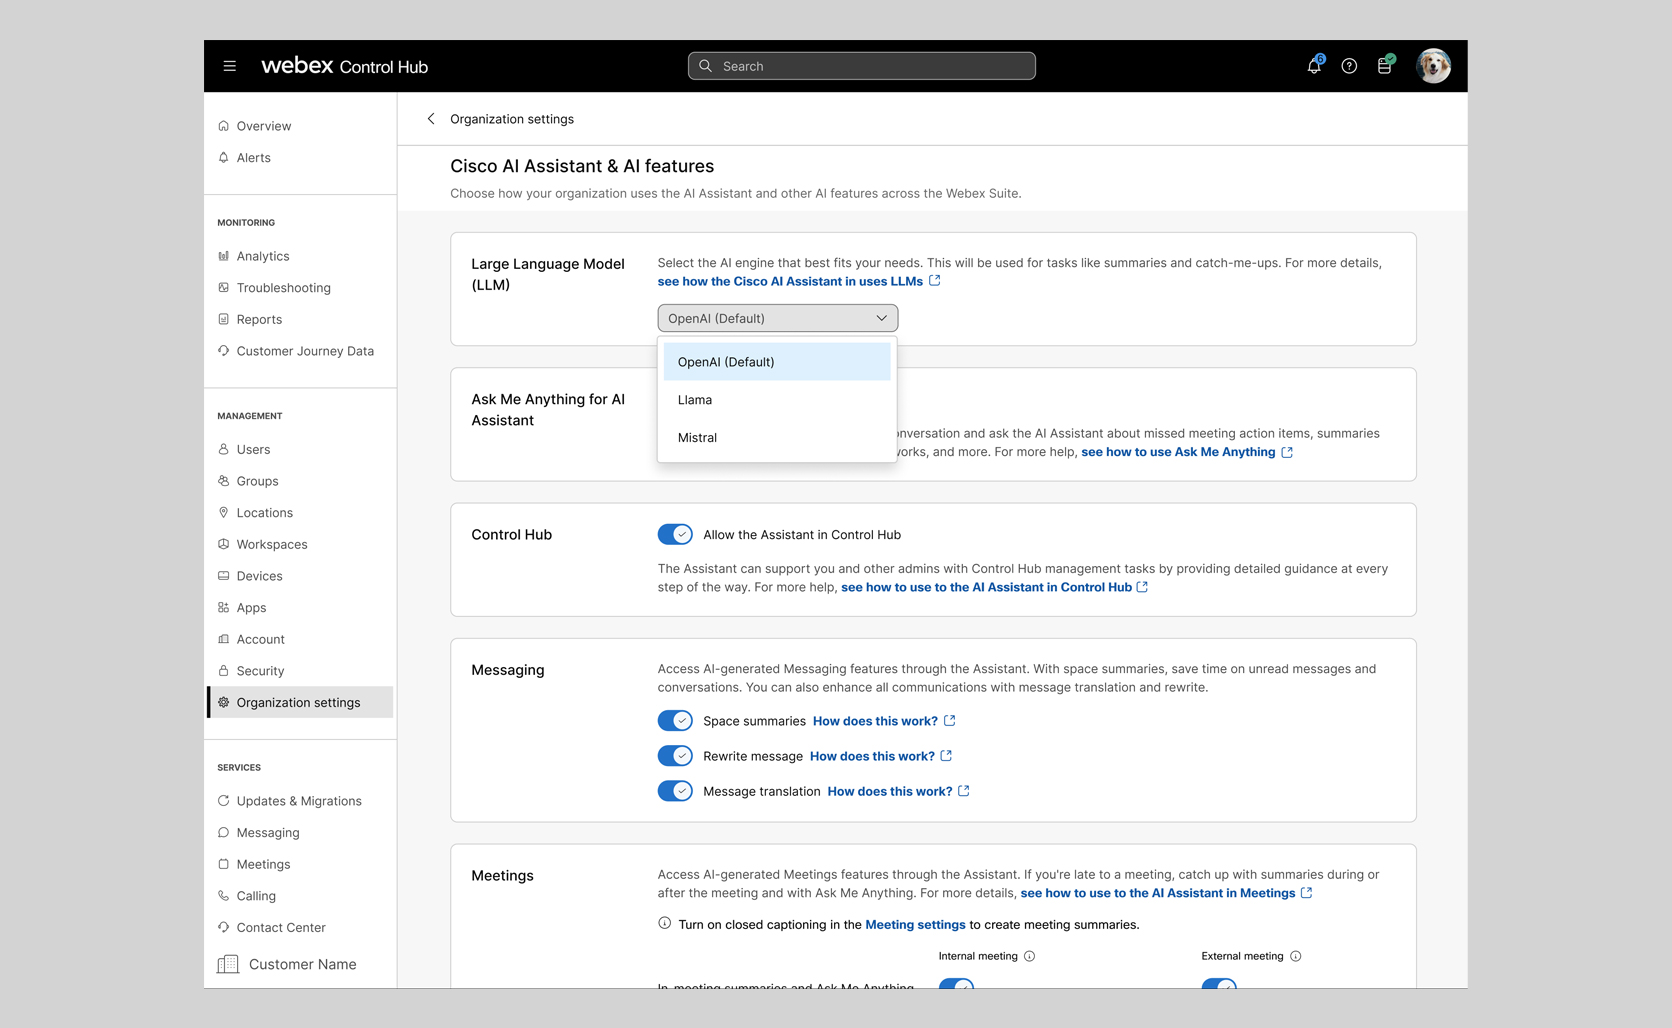
If you use Webex at work, your admin controls most AI note-taking permissions. They need to enable Cisco AI Assistant from Control Hub before you can use meeting summaries, transcripts, and AI features.
Ask your admin to check these settings:
- Go to Control Hub
- Open Organization Settings
- Select Cisco AI Assistant & AI features
- Open Customize AI Assistant and AI features
- Go to the Meetings section
- Turn on Enable AI Assistant in meeting
This is the foundation. Without it, your Webex AI note taker may not appear in your meeting controls.
Step 2: Choose what AI features your team can use
Once AI Assistant is enabled, your admin can decide how far the feature should go. This is useful if your company wants more control over privacy, external guests, or recordings.
Your admin can configure options such as:
- AI Assistant inside meetings
- Auto-detection of spoken language
- AI Assistant when recording starts
- External participant access to AI Assistant
- Audio announcements when AI Assistant starts
- AI Assistant access from the Meetings tab
If your company handles sensitive calls, these settings matter. You want useful AI notes, but you also want clear rules around who can access them.
Step 3: Start your Webex meeting
Once your admin settings are ready, start or join your Webex meeting as usual. If you are the host or cohost, you usually have more control over the AI summary.
During the call:
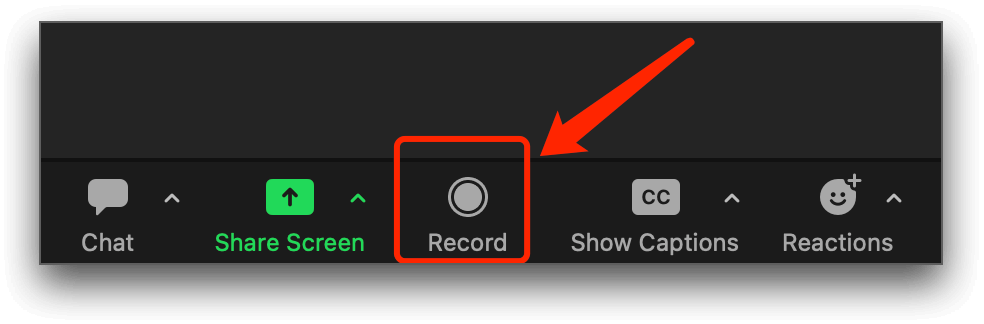
- Open the AI Assistant panel
- Start the meeting summary
- Choose the spoken language if Webex asks for it
- Let participants know that AI notes or transcripts may be generated
This is especially important for interviews, client calls, or internal strategy meetings. Your team should always know when a meeting is being summarized or transcribed.
Step 4: Decide who can start and stop the summary
Hosts and cohosts can open the AI Assistant settings during the meeting. From there, they can choose who is allowed to start or stop the summary.
You can choose between:
- Only the host and cohosts can start and stop the summary
- Anyone can start and stop the summary
For formal meetings, keep this limited to hosts and cohosts. For team meetings, allowing anyone to start the summary can save time.
Step 5: Enable AI summaries for recordings
If you want Webex to summarize recorded meetings, you need to configure recording settings too. Go to User Hub, then open Settings > Meetings > Recording.
From there, enable AI summary and Chapters for cloud recordings. This allows Webex to generate notes, chapters, and summary content when you record a meeting.
All-in-One Free Webex Note Taker: Noota

If you want a more flexible way to record, transcribe, summarize, and reuse your meetings, Noota gives you a simpler option.
With Noota, you can:
- Record your Webex meeting
- Automatically transcribe the conversation
- Generate meeting minutes
- Extract action items and decisions
- Access conversational analysis
- Store your meetings in one searchable dashboard
- Share your notes with your team
How Noota works with Webex
The setup is simple. You install the Noota browser extension or desktop app, join your Webex meeting, and start recording from the extension.
Use for free Noota Webex integration.
Webex AI Note Taker Troubleshooting
Webex AI Note Taker can save you a lot of time, but only when the right settings are enabled. If your summaries, transcripts, or action items are missing, the issue usually comes from permissions, recording settings, language settings, or meeting access.
Here are the most common problems and how to fix them.
1. You can’t see Cisco AI Assistant in Webex
If the AI Assistant button does not appear, your account may not have access to the feature. In many companies, this is controlled by your Webex admin.
Ask your admin to check:
- Whether Cisco AI Assistant is enabled in Control Hub
- Whether AI Assistant in meetings is enabled
- Whether your meeting uses the supported Webex meeting platform
- Whether your user account or template has AI features turned off
If you are joining from outside the organization, you may also be blocked from using AI Assistant. In that case, ask the host to confirm whether external participants are allowed to access it.
2. You can see AI Assistant, but you can’t start the summary
Sometimes the feature is visible, but you still can’t activate it. This often happens when only the host and cohosts are allowed to start or stop the summary.
To fix it:
- Ask the host to start the summary
- Ask to be made cohost
- Ask the host to change the setting to Anyone can start and stop the summary
This is not a bug. It is a meeting permission setting.
3. Your meeting summary is not saved after the call
If you used AI Assistant during the meeting but can’t find the summary afterward, check the content availability settings. The host may have selected Save summary only, or Don’t save summary and transcript.
You can also check:
- Your Webex meeting history
- The meeting recap area
- The Webex space linked to the meeting
- The host’s Webex account
If you still can’t access it, contact your admin. Webex states that saved summaries and transcripts depend on meeting and admin settings.
4. Your transcript is missing
A missing transcript usually means one of three things: transcript access was disabled, the meeting was not recorded, or the recording summary is still processing.
For recorded meetings, make sure:
- The meeting was recorded to the cloud
- AI summary and chapters were enabled
- Recording transcripts are allowed by your organization
- You are checking the host’s recording area
- The recording has finished processing
If you need the transcript for compliance, sales follow-up, or interviews, always test the setup before the real meeting.
5. The language or translation is wrong
Webex uses the spoken language set for the meeting to generate summaries and transcripts. If the wrong language was selected, your notes may look incomplete or inaccurate.
Before the meeting starts, check the spoken language setting. If your team switches between languages, make sure Webex supports your use case before relying on the transcript.
6. The summary is too short or action items are missing
AI summaries depend on what was actually said in the meeting. If your team discusses next steps vaguely, Webex may not capture clear action items.
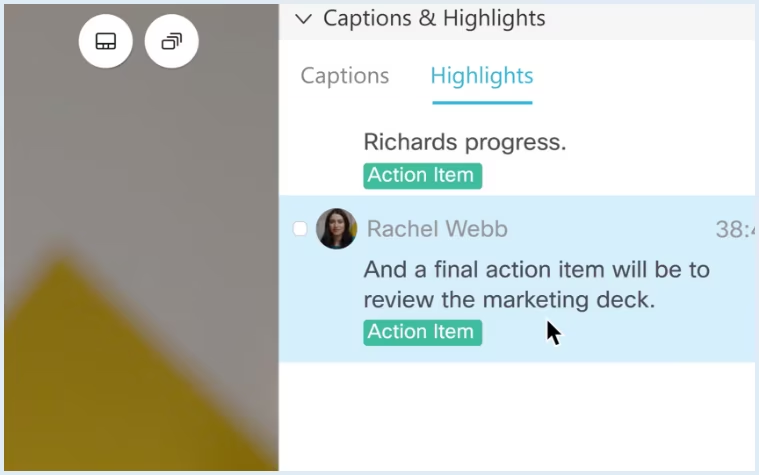
To improve your notes, say decisions out loud. Use phrases like “Sarah will send the proposal by Friday” or “The next step is to book a follow-up call.”
Clear meetings create clearer AI notes. If your process is messy, your summary will be messy too.
7. The transcript is inaccurate
Poor audio is one of the fastest ways to break your AI notes. Background noise, people speaking over each other, weak microphones, and shared meeting-room devices can all reduce accuracy.
To improve your transcript:
- Use a good microphone
- Ask people not to interrupt each other
- Avoid noisy rooms
- Join from separate devices when speaker attribution matters
- Review names, acronyms, and technical terms after the meeting
You don’t need a perfect transcript every time. But you do need notes you can trust before sending them to your team or clients.
Meet the Writer

Jean-marc is an AI expert helping recruiters & professionnals leverage these tools in their everyday work processes.