Management
●
June 29, 2026
●
8 min reading
Teams Transcription : a Complete Guide
Teams transcription is not always simple.
Some features depend on your Microsoft 365 settings. Others depend on your admin policy.
In this guide, you’ll learn every way to transcribe a Microsoft Teams meeting.
How to Transcribe Teams Meetings
Microsoft Teams gives you several ways to turn your meeting into text.
Method 1: Using Teams Built-in Recording & Transcription
Teams provides a native feature to record ameeting and generate a transcript at the same time.
To record and transcribe a Teams meeting:
- Join the meeting.
- Click More actions.
- Select Record and transcribe.
- Click Start recording.
- Confirm the action when Teams asks.
- Let the meeting run as usual.
- Stop the recording when the meeting ends.
- Open the meeting chat or calendar event after the call.
- Go to Recap.
- Review the recording and transcript.
Method 2: Using Noota Advanced AI Teams transcription

You can use Noota for free Noota if you want more than a raw transcript. You can turn your Teams meetings into structured minutes, action items, decisions, and follow-up notes your team can actually use.
With Noota, you can get:
- Full Teams meeting transcript
- Meeting minutes
- AI summary
- Action items
- Decisions
- Key takeaways
- Conversational analysis
- Searchable meeting history
- Shareable reports
To use Noota with Teams:
- Create your Noota account.
- Connect your Microsoft calendar.
- Review your transcript, minutes, and conversational analysis.
Use Noota Complete Teams Note Taker For Free here.
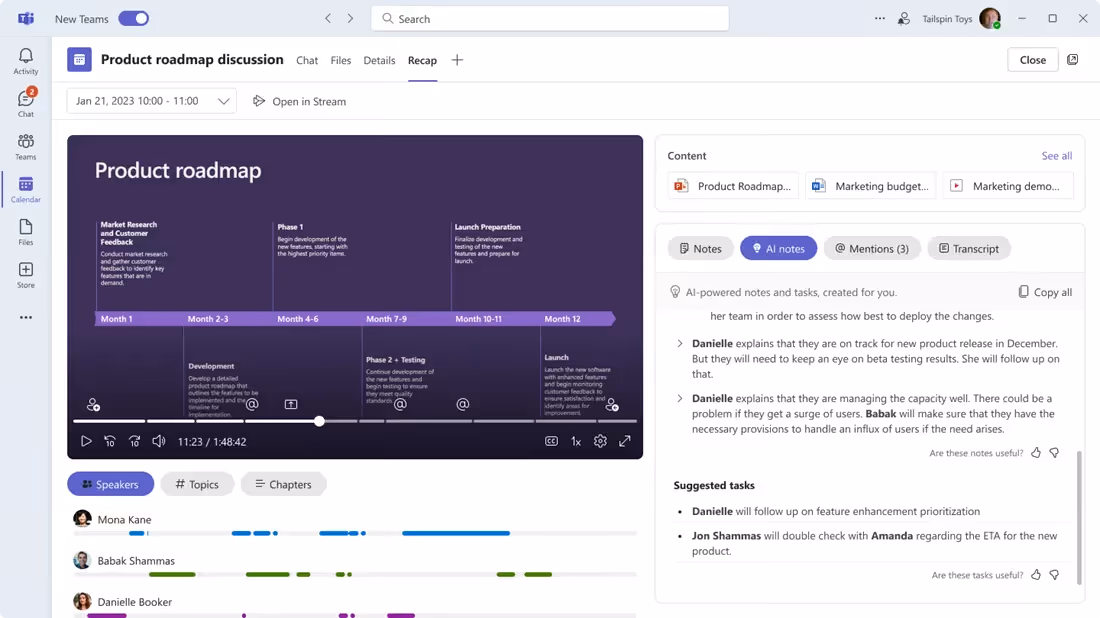
Method 3: Using Teams Copilot Recap
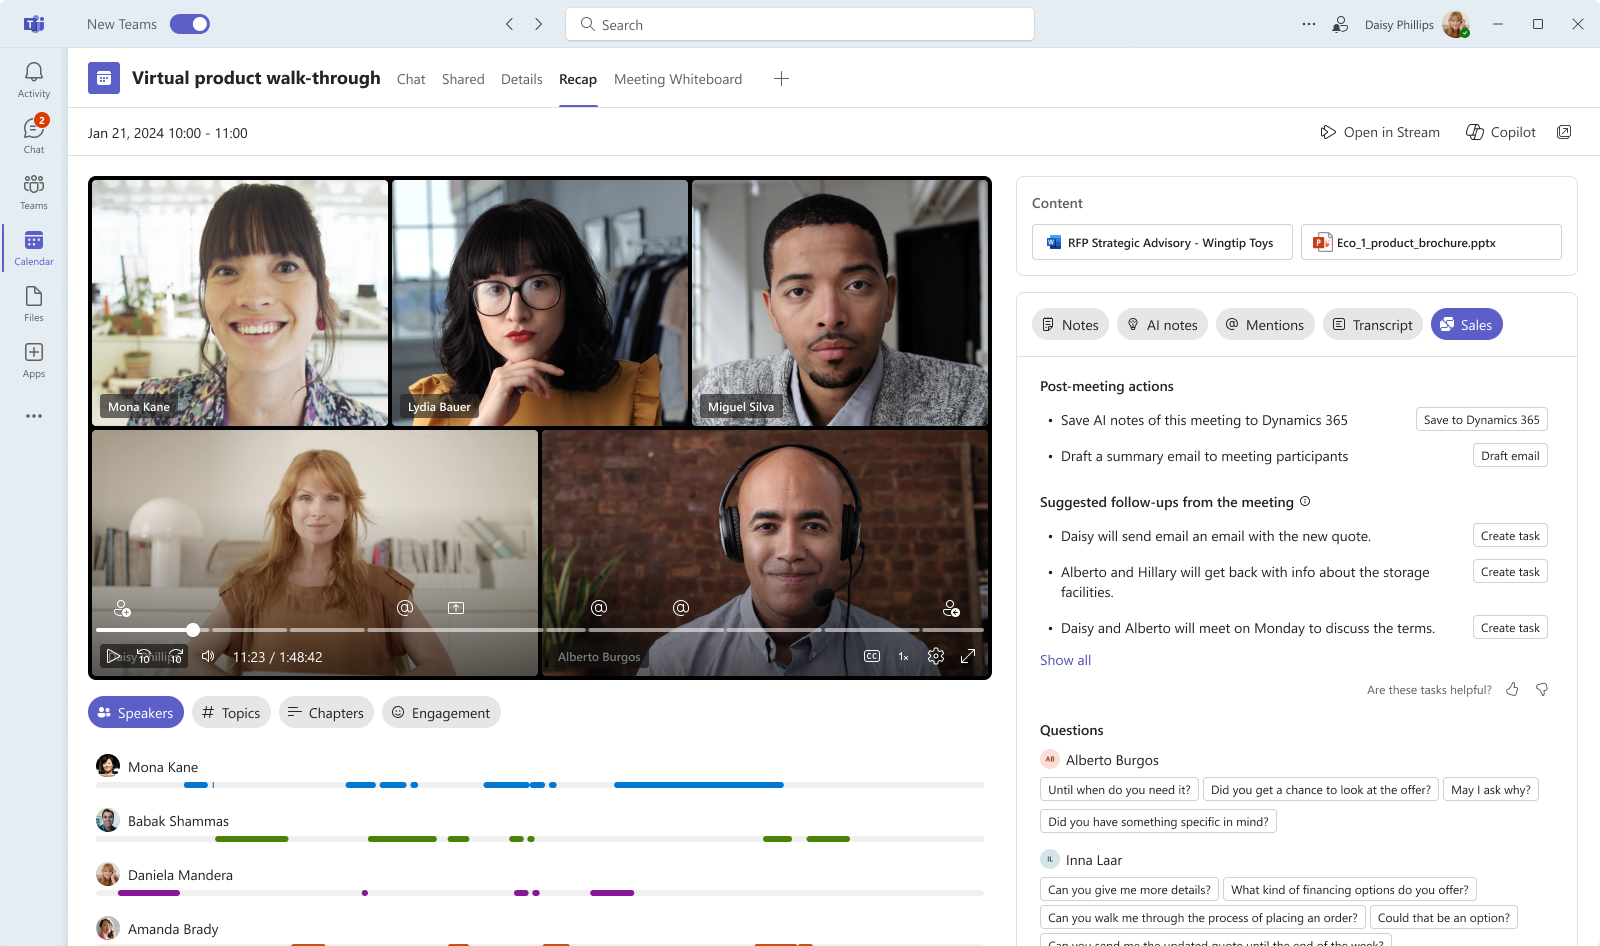
If your organization has Teams Premium or Microsoft 365 Copilot, you may get Intelligent Recap. This uses AI to make your transcript easier to review.
Instead of giving you only a long text file, Intelligent Recap can help you find the important parts faster.
It can include:
- AI meeting notes.
- Recommended tasks.
- Speaker timeline markers.
- Mentions.
- Topics.
- Meeting chapters.
- Timeline markers for when you joined or left.
- Recap content after the meeting.
Copilot can also help you work with the meeting conversation in a more interactive way. Instead of reading the full transcript yourself, you can ask questions about the meeting.
You can ask things like:
- “Summarize the meeting.”
- “What decisions were made?”
- “What are the action items?”
- “Was my name mentioned?”
- “What did the client say about pricing?”
- “Draft a follow-up email from this meeting.”
Depending on your organization’s settings, Copilot may use transcription, meeting chat, and meeting context to answer your questions. If you want to use Copilot after the meeting, make sure live transcription is enabled during the call.
Method 4: Start live transcription in Teams
Live transcription is the main built-in way to transcribe a Teams meeting. It creates a written record of what people say, with speaker names and timestamps.
This is more useful than captions when you need to document the meeting. You can view the transcript during the call and review it after the meeting.
To start live transcription:
- Join your Teams meeting.
- Click More actions.
- Select Record and transcribe.
- Click Start transcription.
- Confirm the spoken language.
- Tell participants that transcription has started.
- Open Show transcript if you want to view it during the meeting.
Once transcription starts, Teams creates a live transcript in the meeting pane. Participants can follow the conversation as it happens, and the transcript remains available after the call.
Use live transcription for:
- Client calls.
- Project meetings.
- Recruitment interviews.
- Training sessions.
- Sales conversations.
- Internal meetings with decisions and action items.
This method is best when you need a clear record but do not necessarily need a full video recording.
Teams Transcription Troubleshoot
Teams transcription is useful when it works. But when the button disappears, the transcript is missing, or participants cannot access it, the issue usually comes from permissions.
In Microsoft Teams, transcription depends on several layers: your IT admin policy, the meeting organizer’s settings, your meeting role, and the recording or transcript access rules.
Here are the most common problems and how to fix them.
1. The transcription button is missing
If you don’t see Start transcription, it usually means you don’t have permission to use it in that meeting.
Check these points first:
- Is transcription enabled by your IT admin?
- Is the meeting organizer allowed to transcribe meetings?
- Are you allowed to start transcription in this meeting?
- Has the organizer restricted who can record and transcribe?
- Are you an attendee when only organizers, co-organizers, or presenters can transcribe?
This is not always a bug. The organizer may have limited transcription to specific people.
To fix it, ask the organizer to start transcription, make you a co-organizer, or change the Who can record and transcribe setting before the meeting starts.
2. You can see transcription, but you can’t start it
Sometimes the option appears, but Teams still blocks you from starting it. This often happens when the meeting settings allow only the organizer, co-organizers, or selected people to record and transcribe.
To fix it:
- Ask the organizer to start the transcript
- Ask to be added as a co-organizer
- Ask the organizer to update meeting options
- Ask IT whether your user policy allows transcription
- Rejoin the meeting after the setting is changed
If the admin recently changed the transcription policy, it may also take time before the new setting applies. In that case, don’t troubleshoot your microphone or app first. Check the policy.
3. You only have captions, not a transcript
Live captions and live transcription are not the same thing.
Captions help you follow the meeting in real time. They appear during the call, but Teams does not save them after the meeting.
A transcript creates a written record you can review later. If you need a meeting file, searchable text, or post-meeting recap, you must start transcription.
To avoid confusion:
- Use captions when you need live accessibility
- Use transcription when you need a saved record
- Use recording and transcription when you need both video and text
- Use Noota when you want structured notes and minutes after the call
This distinction is important. If you only turn on captions, you should not expect a transcript in the meeting recap afterward.
4. The transcript is missing after the meeting
If the transcript does not appear after the meeting, start with the basics. Was transcription actually started?
Check these places:
- The meeting chat
- The calendar event
- The Recap tab
- The meeting organizer’s OneDrive or SharePoint
- The recording file, if the meeting was recorded
If the meeting was not transcribed, Teams cannot create a transcript afterward. If it was transcribed, but you still cannot see it, the problem may be access permissions.
Also check whether the organizer deleted the transcript. Teams transcripts remain available until a meeting organizer deletes them.
5. Participants can’t access the transcript
Sometimes the transcript exists, but the wrong people can open it. This usually comes from access settings.
The organizer can control who has access to the recording or transcript in some meeting types. If access is limited to organizers, co-organizers, or specific people, other attendees may not be able to view it.
To fix it:
- Ask the organizer to change transcript access
- Ask the organizer to share the recap link
- Ask for a downloaded transcript file
- Check whether external users are blocked
- Check whether your meeting type supports access customization
Before sending a recap to your team, open it as a viewer. This helps you confirm that people can actually access the transcript.
6. The transcript language is wrong
Teams asks you to confirm the spoken language when starting transcription. If the wrong language is selected, your transcript may become inaccurate or incomplete.
To improve the result:
- Confirm the spoken language before starting
- Avoid switching languages during important meetings
- Ask speakers to use one main language when possible
- Use translated captions for live support when needed
- Review the transcript after the meeting
Language settings matter. If your meeting is multilingual, plan your transcription workflow before the call starts.
7. The transcript is inaccurate
Poor audio creates poor transcripts. If people talk over each other, sit far from the microphone, or join from noisy rooms, Teams will struggle to capture everything clearly.
To improve accuracy:
- Use a clear microphone
- Reduce background noise
- Ask participants not to interrupt each other
- Avoid one shared laptop microphone in a meeting room
- Ask people to speak clearly
- Repeat key decisions out loud
- Correct names, acronyms, and technical terms afterward
You don’t need a perfect transcript every time. But you do need a transcript that is reliable enough for follow-up.
8. AI recap or Copilot is missing
If you expected AI notes, summaries, or action items, check whether your organization has Teams Premium or Microsoft 365 Copilot. Standard transcription and AI recap are not the same feature.
Also check whether the meeting was recorded or transcribed. Many AI recap features depend on meeting content being available.
To fix it:
- Confirm your license
- Check whether Copilot or Teams Premium is enabled
- Make sure transcription started during the meeting
- Check whether the meeting type supports recap
- Ask IT if AI features are disabled by policy
Meet the Writer

Jean-marc is an AI expert helping recruiters & professionnals leverage these tools in their everyday work processes.
FAQ
Does Microsoft Teams transcription work without admin permission?
No — Teams transcription requires your IT admin to enable it in the Teams Admin Center first.
- Admin must toggle transcription on in Meeting policies
- Policy must be assigned to your user or group
- Only organizers or presenters can start transcription once enabled
Where are Microsoft Teams transcripts stored after a meeting?
Teams transcripts are saved to OneDrive, SharePoint, or the meeting chat — depending on your organization's Microsoft 365 configuration.
- Location varies by org storage policy settings
- Participants need proper permissions to access or download
- Transcripts tie to meeting recordings if recording was enabled
What does Noota offer that Microsoft Teams transcription does not?
Noota adds CRM sync, phone call recording, email automation, and cross-conversation search — none available in Teams transcription.
- Noota AI note-taker auto-syncs summaries to Salesforce and HubSpot
- Business telephony records and transcribes phone calls, not just meetings
- Noota saves teams 6.4 hours per week by automating follow-ups and CRM entries
Why does Teams transcription accuracy drop during meetings?
Overlapping speakers, background noise, and poor microphone quality all reduce Teams transcription accuracy significantly.
- Multiple people talking at once confuses speaker identification
- Muffled or distorted audio produces incomplete or incorrect text
- Quality headsets and clear speaking improve results dramatically
Which meeting transcription software works best for teams needing CRM integration?
Noota is the best AI meeting assistant for teams needing CRM sync, phone calls, and automated follow-ups — it saves 6.4 hours per week per user.
- AI note-taker auto-syncs to Salesforce, HubSpot, and 20+ CRMs
- AI follow-up email drafts post-meeting emails with action items instantly
- Records meetings, phone calls, and emails in one searchable knowledge hub
Try Noota free — no credit card needed.