Management
●
August 4, 2025
●
8 min reading
How to Annotate on Google Meet
With Google Meet’s annotation feature, you can highlight key points, sketch ideas, and guide your audience visually.
But here’s the catch—annotation in Meet is new. Not everyone knows how to use it.
In this guide, you’ll learn how to annotate in Google Meet step by step
Can You Annotate on Google Meet Calls?
Yes—you can now annotate directly inside Google Meet. This feature lets you draw, type, and mark up your shared screen in real time.
Annotation is available in the Google Meet desktop app and Chrome browser version 124 or higher.
If you're on Android, you can annotate when sharing your entire screen.
Right now, iOS support is limited, but Google is working on it.
If you don’t see the annotation tools, make sure you’re on a supported browser or device.
What it’s good for
You can annotate over:
- Documents
- Slides
- Websites
- Any screen content you share
It works best in live demos, training sessions, or collaborative meetings where visuals matter.
How to Set Up Meet Annotation
Ready to annotate in Google Meet?
Here’s how to get started in just a few clicks.
Step 1 – Start your Google Meet
Join your meeting as usual in Google Chrome or the Google Meet desktop app.
Annotation only works in these environments, so avoid using Safari or Firefox.
Make sure you’re using Chrome version 124 or higher.
You can check this by typing chrome://settings/help in your browser bar.
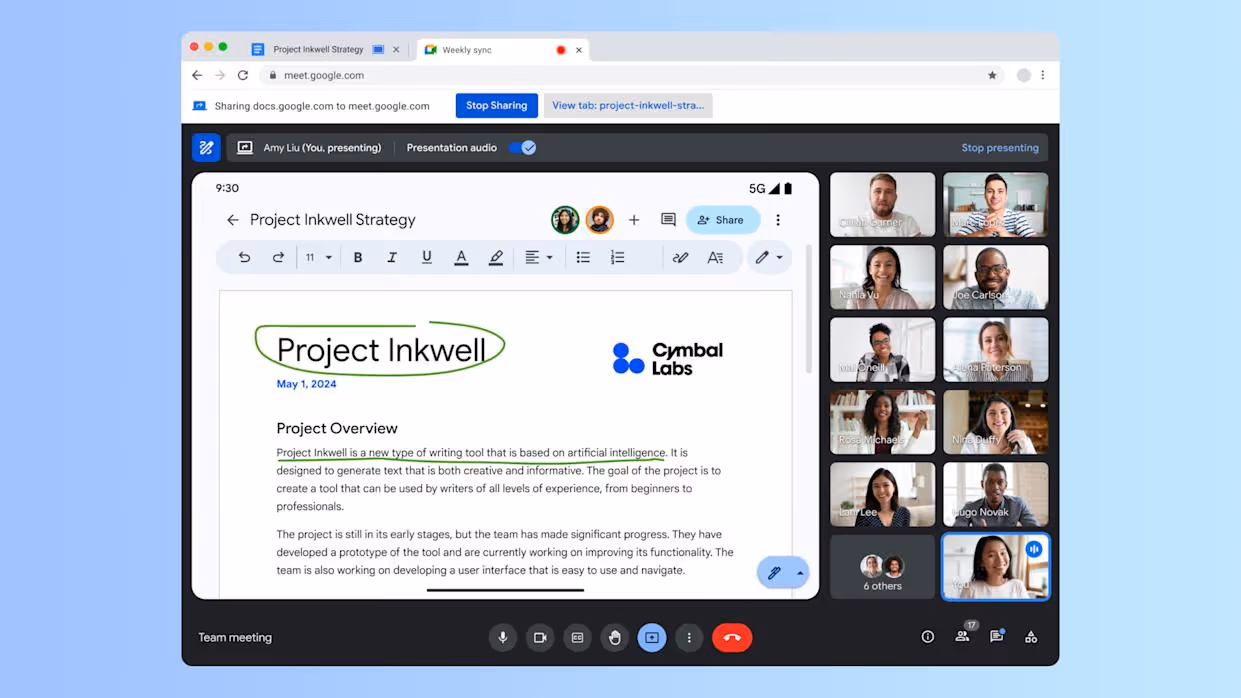
Step 2 – Share your screen
Click Present now at the bottom of your Meet window.
You can choose to share:
- Your entire screen
- A window
- A specific Chrome tab
To use annotation, any of these options work. Just pick what you need to show.
Once you start sharing, the toolbar at the bottom of your screen will change.
Step 3 – Click Annotate
In your new toolbar, find the pen icon labeled Annotate.
Click it, and you’ll see your annotation tools appear.
Now you can draw, type, or add notes over your screen.
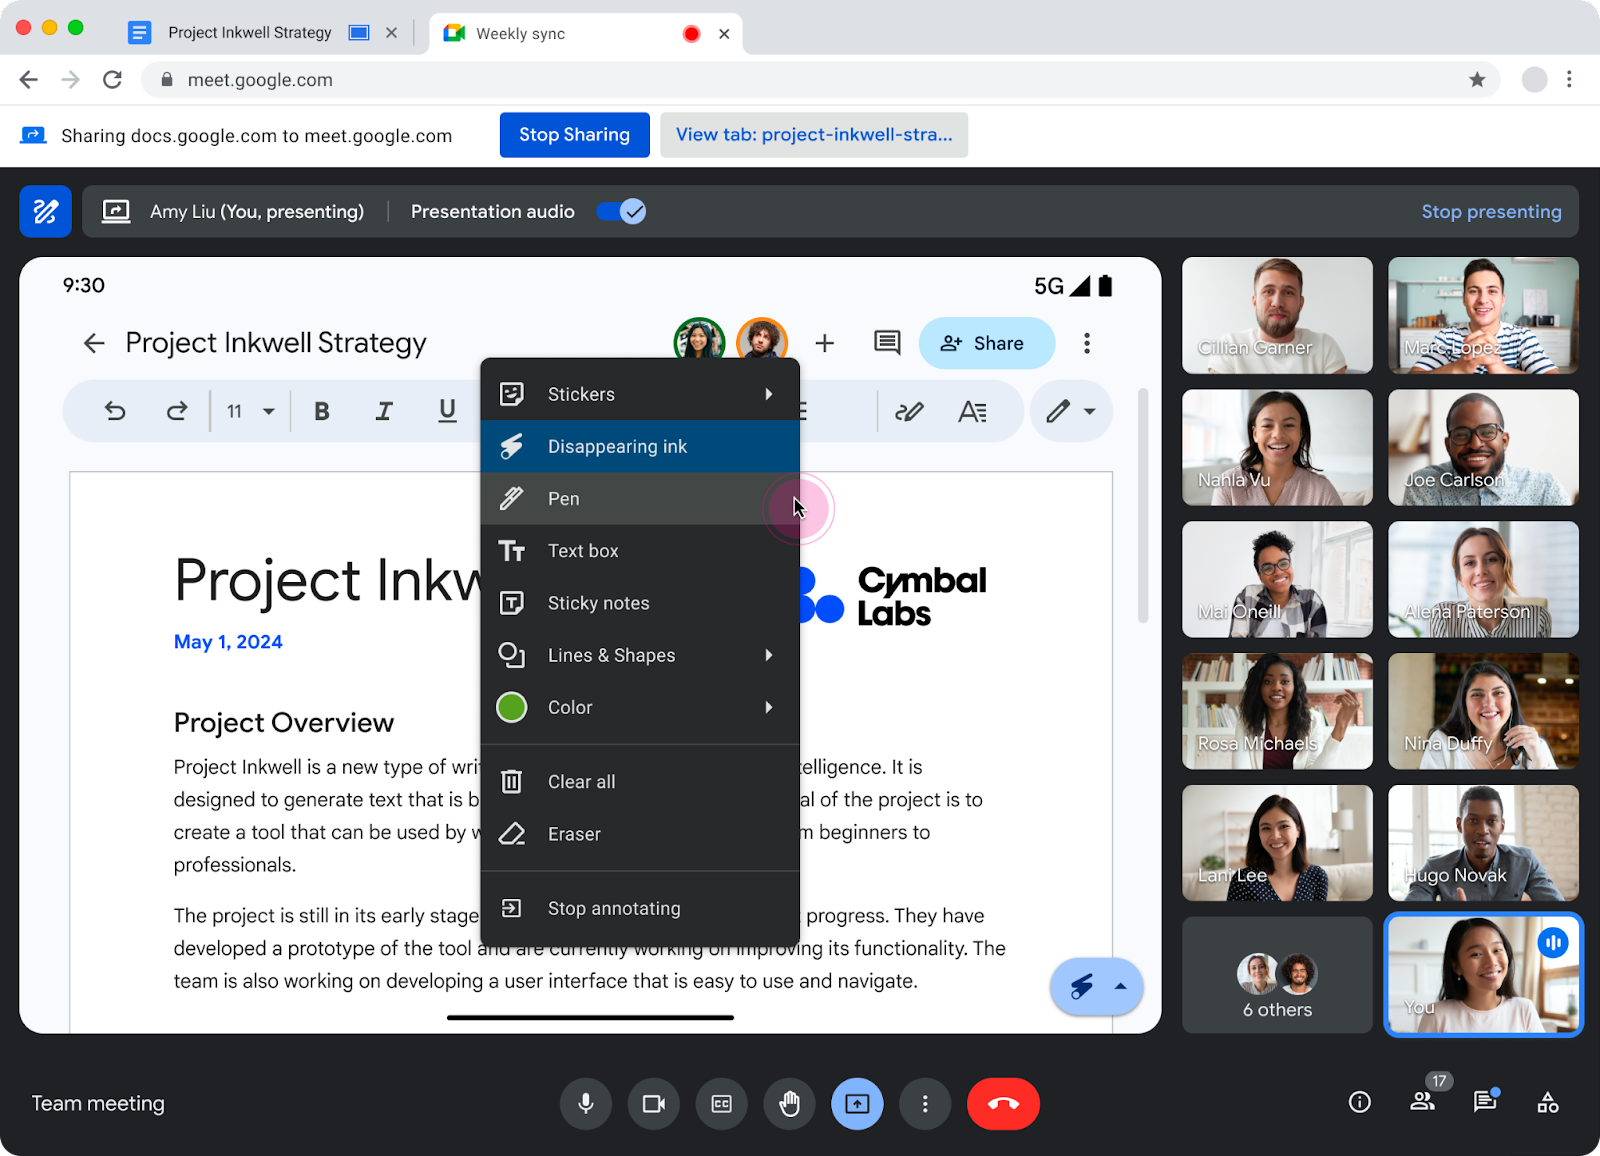
Step 4 – Use the tools
You have several tools to choose from:
- Pen – Draw freehand with different colors
- Disappearing ink – Marks fade away after a few seconds
- Shapes – Add lines, arrows, or boxes to highlight areas
- Text – Type directly on the screen
- Sticky note – Add short comments in bright boxes
- Eraser – Remove specific marks
- Clear all – Erase everything in one click
Pick the tool you need from the toolbar.
Customize colors and line thickness easily.
Step 5 – Add co-annotators (optional)
Want others to annotate with you?
Click People to open the participant list.
Find someone, click the three dots next to their name, and choose Add as co‑annotator.
They can now draw with you in real time.
You stay in control—you can remove them anytime.
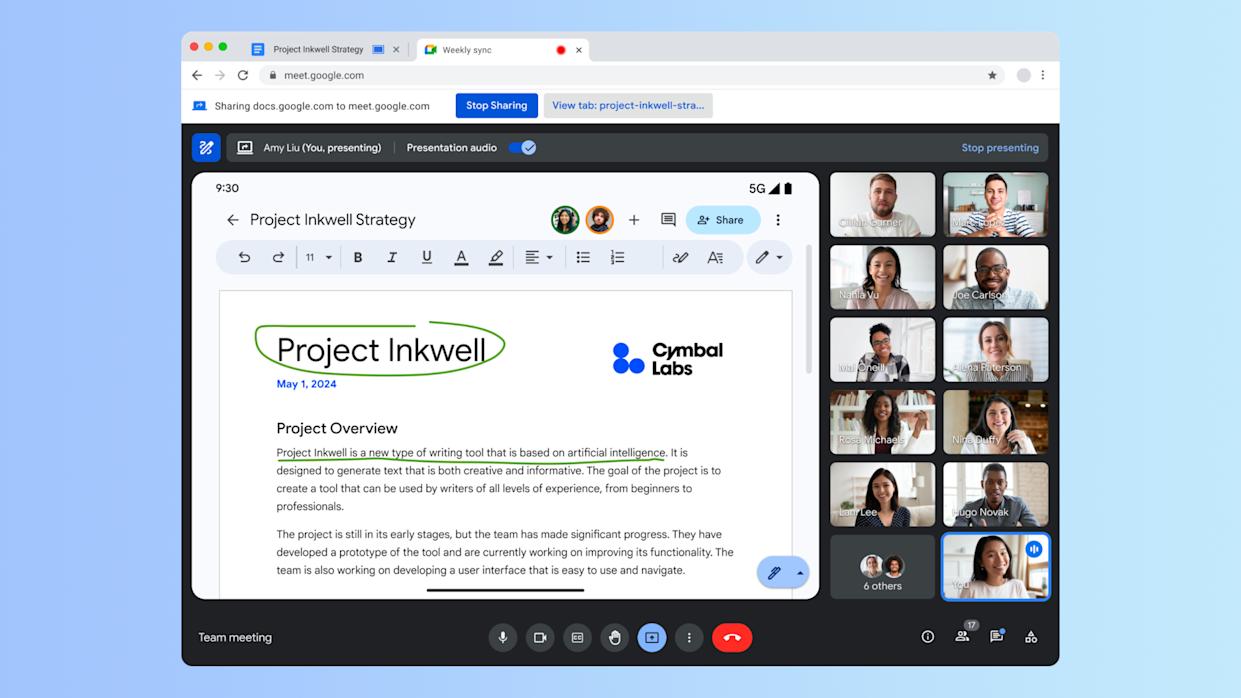
Step 6 – Stop annotation
Done marking up the screen?
Click Annotate again to exit annotation mode.
Your shared screen continues, but the tools disappear.
Remember: annotations are not saved automatically.
If you want to keep your work, take a screenshot before stopping.
Troubleshoot Google Meet Annotation
Trying to annotate but it’s not working?
Here’s how to fix the most common problems quickly.
Problem 1 – No “Annotate” button
You’re sharing your screen, but there’s no Annotate icon in your toolbar.
Fix:
Check your browser. You must be using:
- Google Chrome (version 124 or higher), or
- The Google Meet desktop app
Other browsers won’t show annotation tools. Update Chrome if needed. Type chrome://settings/help to check your version.
Problem 2 – Using the wrong device
Annotation doesn’t appear on mobile browsers, Chromebooks, or older devices.
Fix:
Switch to a desktop computer and open Meet in Chrome or the desktop app.
If you’re on Android, you can annotate—but only after sharing your screen in the Meet app. iOS support is limited for now.
Problem 3 – Not sharing your screen correctly
You’re in the call, but the tools still don’t appear.
Fix:
Click Present now, then choose Your entire screen, a window, or a tab.
Once sharing starts, the toolbar updates and Annotate becomes visible.
Tip: If you’re watching someone else’s screen, you can’t annotate. Only the person sharing can draw.
Problem 4 – Co-annotator option missing
You want to let others draw, but you don’t see the option.
Fix:
Click People to open the participant list.
Click the three dots next to their name, then Add as co‑annotator.
Still no option? Try signing out of extra Google accounts and reloading the meeting. Multiple logins can block permissions.
Also, co-annotation is only supported on desktop, not mobile.
Problem 5 – Annotations aren’t showing in recordings
You’re recording your meeting but your drawings are missing from the playback.
Fix:
Google Meet’s built-in recording captures only your shared screen, not your annotations.
If you need to save your marks, take a screenshot during the meeting.
Or, use a tool like Noota to record your full screen—including drawings, voice, and summaries.
Problem 6 – Tools lag or crash
Your annotation tools freeze or delay when you draw.
Fix:
Disable Chrome extensions that interact with Meet or screen sharing.
Try using a clean Chrome profile or incognito mode to test.
Also, restart your browser or computer to clear memory issues.
Noota – Record Everything

Google Meet lets you annotate live.
But once the meeting ends, your drawings disappear.
That’s where Noota helps :
- Real-time video recording and transcription : While you speak, Noota records and transcribes your words in real time.
Everyvdeo sharing and sentence is saved and time-stamped. So you can easily jump to any moment. - Smart summaries : After the meeting, Noota creates a summary for you. You get a visual and written recap—all in one place.
- Share instantly : Noota syncs with your tools—Slack, Notion, ATS, CRM, and more. You can send the summary to your team with one click.
Everyone stays aligned, even if they missed the call. - Privacy and control : You decide when to record and what to save. You can pause, stop, or delete any recording. Your data stays private and secure, with full GDPR compliance.
Want to record your conversations and annotations ? Try Noota for free now.
Meet the Writer
.webp)
FAQ
Can you save annotations in Google Meet after the call ends?
No — Google Meet annotations disappear when you stop sharing and aren't saved automatically.
- You must screenshot manually before stopping annotation mode
- No export or playback feature for annotation history
- Annotations vanish when presentation ends or call disconnects
What devices support annotation in Google Meet?
Annotation works on Chrome 124+ desktop, Google Meet desktop app, and Android when sharing full screen.
- iOS support is limited and still in development
- Safari and Firefox don't support annotation tools
- Mobile annotation requires sharing entire screen, not individual apps
How does Google Meet annotation compare to Noota?
Google Meet annotation requires manual screenshots and disappears after calls — Noota automatically captures decisions, action items, and full transcripts.
- Noota AI note-taker saves 6.4 hours per week per team member
- Searchable meeting library with CRM sync — no manual exports needed
- Auto-generated action items sent to assignees after every call
When should you use annotation instead of an AI meeting assistant?
Use annotation for live visual demos and design reviews where real-time markup matters more than searchable records.
- Best for whiteboarding sessions and collaborative brainstorming
- Skip it for decision-tracking or compliance documentation needs
- Training sessions benefit from annotation plus automatic meeting notes
Which tool is best for capturing meeting decisions and action items automatically?
Noota is the best AI meeting assistant for automatic meeting notes — it captures decisions, action items, and full transcripts with 80% less admin work.
- AI meeting summarizer generates searchable summaries after every call
- Auto-sync to Salesforce, HubSpot, and 30+ CRMs
- 95% of users say Noota keeps meetings more focused
Try Noota free — no credit card needed.